While I love my DSLR, I certainly don’t mind grabbing my iPhone to ‘get the shot’, especially when it’s the more convenient option!
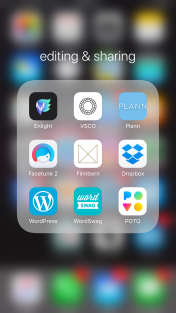
These are the two main apps I use to edit and upload to Instagram:
this post contains affiliate links, thank you in advance for reading!
Facetune [approx $3- wait until you see what I do with this one!]
taken with iPhone 7plusedited with iPhone
While I do have VSCO in my edit playlist, as well as Filmborn (both Free) I seldom use these. Not that they’re not great, they just don’t jive with my style to keep things looking cohesive.
Plann is a new app I discovered for pre-planning and scheduling IG posts. It gives you a visual of what your grid will look like before actually posting.
Wordswag I use for my other business social media posts, and Poto is a new to me, so I’m still navigating the waters with this one. It is great for creating collages, but I’m sure there is so much more I have yet to use.
Enlight is my go-to. As it has lots of fine tuning options and masking capabilities. There are plenty of filters to choose from, or if you prefer to hand edit, like I do, there are many things to have fun with here!
I use Dropbox all the time! It’s the perfect little portal to get images back and forth from phone to Mac and vice versa.
Let’s dive in, shall we?
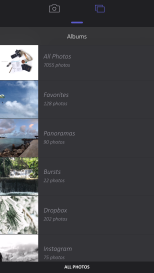
1. Enlight- I select my image. I will usually “favourite” the ones I want to edit to make it easier to find and save time.
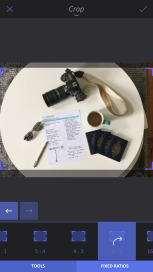
2. Crop. I always use 2:3 ratio. This keeps my grid consistent.
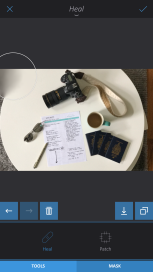
3. “Heal and Patch” can be found in “Tools”. I usually don’t use this if I can help it, as it’s time consuming and tedious, and quite frankly, not near as amazing a photoshop would be. In this case, I didn’t want the flooring to be in the image and I was striving for a simple, white background with a goal of a minimalist feel. It’s best to get the outcome correct in camera, but it’s not always achievable, so this is a workaround.
4. Facetune- This step can be done first, if I didn’t need to do any “healing/patching” to the image. I use the ‘Whiten’ tool to do just that! Whiten. It’s the perfect little gem to make whites nice and bright! I also use “Glow” to beef up the whites as well.
I haven’t found a need for the other tools, but the whiten and glow feature were well worth the $3.
*** when I was writing this blog, I had already finalized my image, hence the logo in the ‘after’. To my knowledge, there is no ‘text’ option in Facetune.***
Enlight-
select ‘adjust’ pannel
use curves to add matte
adjust contrast, brightness, exposure
blacks, shadows and sharpening
colour temp, saturation, hue
5. Enlight- I go into the ‘Adjust’ panel and tweak brightness, contrast, shadows, blacks, WB and/or curves if I wish to add a matte, or play with the colour channels.
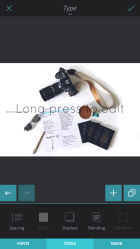
6. Adding a watermark. Even though it’s not my usual watermark (I’m going to look into a way to do this), I always add my name to my work, it’s not necessary, but I like it. For me, it’s the cherry on top.
The font list is not overly large, but I found one that is simple and works for me.
7. Because I’ve been asked dozens of times how I get that white border in my IG images. Here is the trick. In Enlight, I go to ‘Finalize’ and select ‘Instafit’. You can select a blurred border or customize your own colour that works with your brand. Because my style is simplistic, I love the white border.
Another Example with iPhone 7 and olloclip wide-angle [same process, no Facetune] lots of curves for the boost of warmth using blue, green and red channels separately to enhance the morning sky and deepen the tones of the sea.
before
curves + shadows + contrast + brightness
BW filter
And that’s it! Once you navigate Enlight, you’ll discover how it works best for you. There are so many amazing features and filters to get you started. I have yet to use it to it’s fullest capacity, I’m sure you will enjoy exercising your creative outlet as you explore it’s full potential!
Hope these tips will inspire you the next time you pick up your phone and snap away!
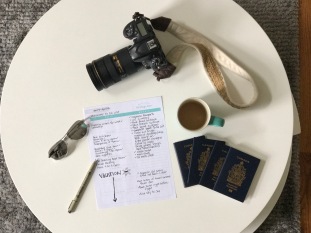
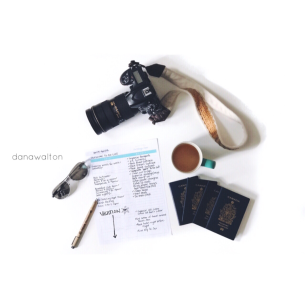
Coming up- My ‘must-have’ images when on vacation.
If you follow me on Instagram, you’ve likely seen this window… a time or two… ok, maybe a tad more… But with that stunning light, how can one resist? Continue reading Sunday Morning Coffee
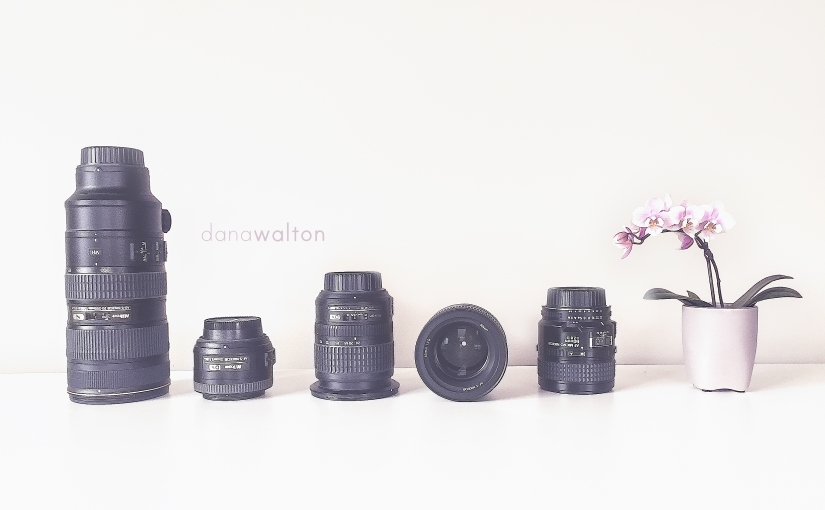
While I do have a great collection, it’s important to know that I have accumulated these babies over the last decade. I use each and everyone of these regularly. Continue reading In My Bag…
Oh boy, the choices out there on the market for lenses. It’s quite overwhelming really. While I will admit that I own a few myself, I must say that I researched the heck out of them before taking the financial plunge. Continue reading Zooms, Primes and Wide Angles oh my!
![Favourite Apps [part two]](https://danawaltonphotography.files.wordpress.com/2017/05/img_8506-1.jpg?w=825&h=510&crop=1)


 6. Adding a watermark. Even though it’s not my usual watermark (I’m going to look into a way to do this), I always add my name to my work, it’s not necessary, but I like it. For me, it’s the cherry on top.
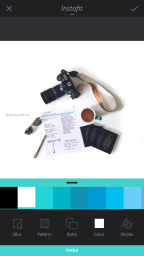 7. Because I’ve been asked dozens of times how I get that white border in my IG images. Here is the trick. In Enlight, I go to ‘Finalize’ and select ‘Instafit’. You can select a blurred border or customize your own colour that works with your brand. Because my style is simplistic, I love the white border.